Knowledge Base
Easy. Flexible. Effective.
Starting Point
Configuring the system
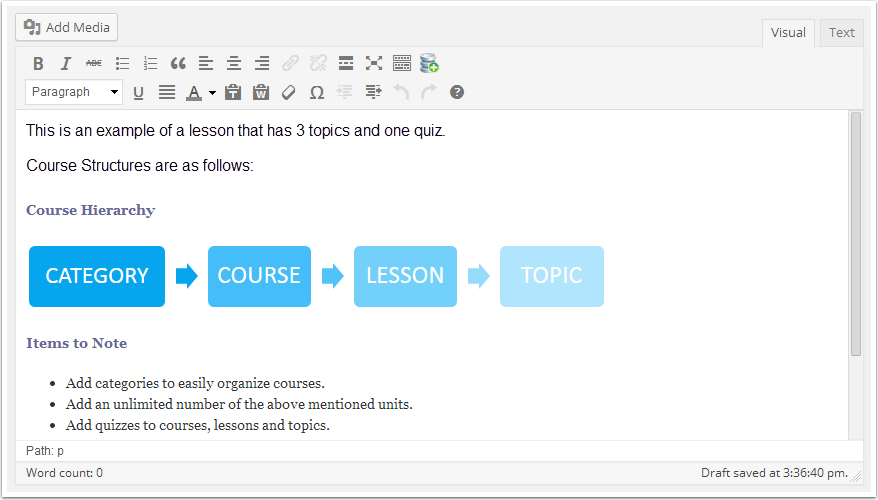
The layout of CMR’s Learning Module is based on the e-learning methodology used in learning programs at Fortune 500 companies.
– The top-level is “Courses”.
– Below that, you have “Lessons”- Lessons are assigned to Courses.
– Below Lessons, you have “Topics”- Topics are assigned to Lessons just like Lessons are assigned to Courses.
– Finally, there are “Quizzes”. Quizzes can be assigned to a Topic, Lesson, or a Course.
Please note that this default terminology can be changed.
3 Tips before getting started:
Tip 1: We cannot stress enough how helpful it is to have a roadmap of your course.
By this, we mean the number of lessons, topics, quizzes and their positioning in the course.
Tip 2: We strongly recommend setting up the architecture of the course before adding content.
Tip 3: Make your titles intuitive and organized to make your road-map easier.
There are 2 core settings located under DASHBOARD > SETTINGS that you need to set up before you go any further:
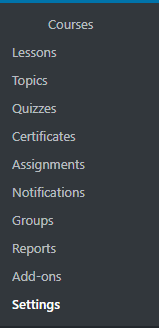
1- General
2- Custom Labels
In this document, we will go over the General setting of your module.
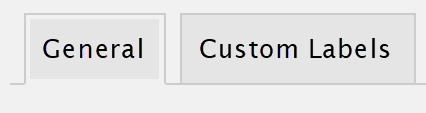
General Settings
The General Settings tab has three options. Below is a description of each:
– Courses Auto-enroll: When selected, the Admin user role is automatically enrolled into any LearnDash course
– Bypass Course Limits: When selected, the Admin user role is not subject to course progression limits
– Include in Reports: When selected, the Admin user role is included in course data and quiz reports
Save your settings by clicking on “Save” to the right of your screen

Configuring the system.
Profile Page
How to modify username, email, and password
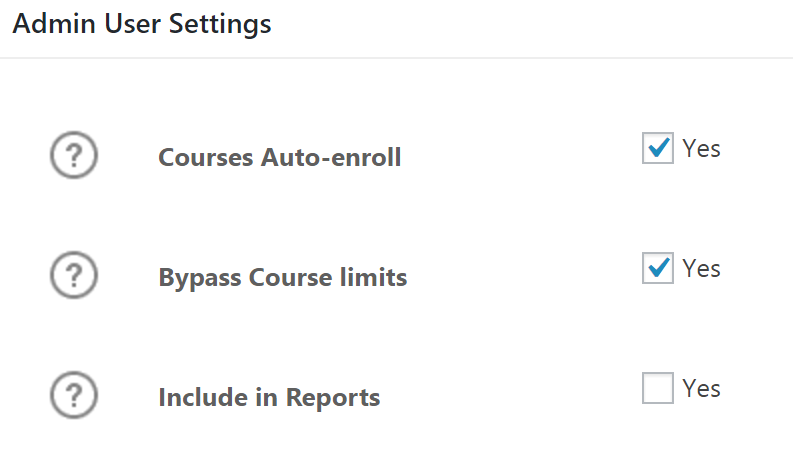
Front-End Profile
The front-end profile displays the following information for the user:
– Enrolled Courses
– Course Progress
– Quiz Scores
– Quiz Answers
– Course Certificates (for reprinting)
– Quiz Certificates (for reprinting)
You can use the following shortcode to create a LearnDash front-end user profile page:
Just insert the shortcode above into any page and the profile will look similar to the example below.
You can choose the sort type and direction of the courses in the profile by using a variation of the profile shortcode. Courses can be sorted by:
– None – No order
– ID – Order by post id. Note the capitalization
– Author – Order by author
– Title – Order by title
– Name – Order by post name (post slug)
– Type – Order by post type
– Date – Order by date
– Modified – Order by last modified date
You do not need to type these values in manually. Instead, you can use the Shortcode Wizard to easily select the variation you prefer. Details on the Shortcode Wizard can be found in the Course Shortcodes video.
Back-End Profile
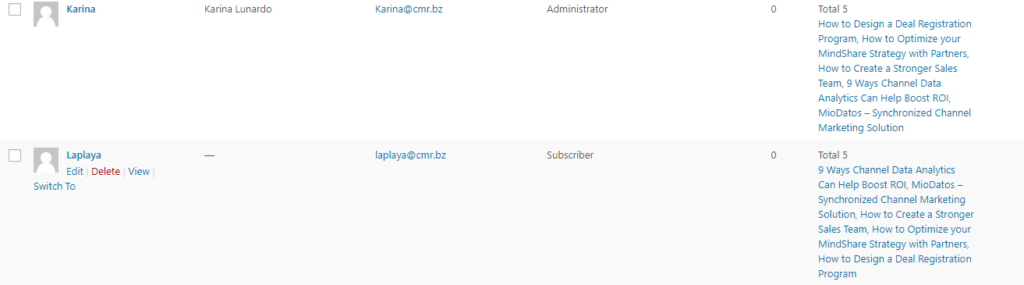
As the Administrator, you have the ability to see this same information on the learner profile from the dashboard.
Navigate to the USERS menu and select the desired user.
From here you can see the enrolled courses and progress. You can modify the progress manually if needed or re-print the user’s certificate on their behalf. The profile page is also where you manually enroll users into courses.
The metrics from the user profile are included in the course and quiz data exports.
Once you are done with the user setting, click on “Update User”

How to create a front-end and back-end profile.
Email Notification
How to set up email notifications.
Use Case Scenarios
You want to send emails to learners based on course-related activities such as course completion, finishing a lesson, passing/failing a quiz, etc.
You want to send emails to Admins and Group Leaders based on learner activity.
Let’s get started:
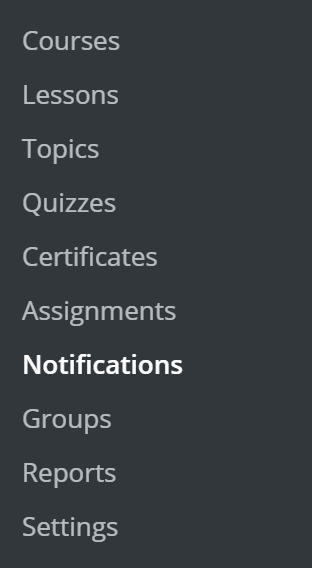
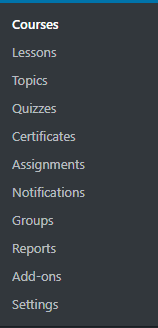
1. Go to your Portal Dashboard > Notifications
2. Click “Add New Notification”

3. Give your notification a Title
The title will be the subject of the email.
4. Configure the settings for the Notification
Located under the Notification Settings section

Email Trigger
Notifications can be sent based on any of the following activities:
– A user enrolls in a course
– The user completes a course
– User completes a lesson
– A scheduled lesson is available to the user
– User completes a topic
– User passes a quiz
– User fails a quiz
– User completes a quiz
– An essay question has been graded
– An assignment is uploaded
– An assignment is approved
– User hasn’t logged in for “X” days
– “X” days before course expires
When you select your email trigger, you will have the option to select a specific course, lesson, topic, or quiz for the message, as shown below:

Instead of selecting one specific course, lesson, topic or quiz, you can also set the notification up as GLOBAL and it will be sent regardless of all courses, lessons, topics, or quizzes.
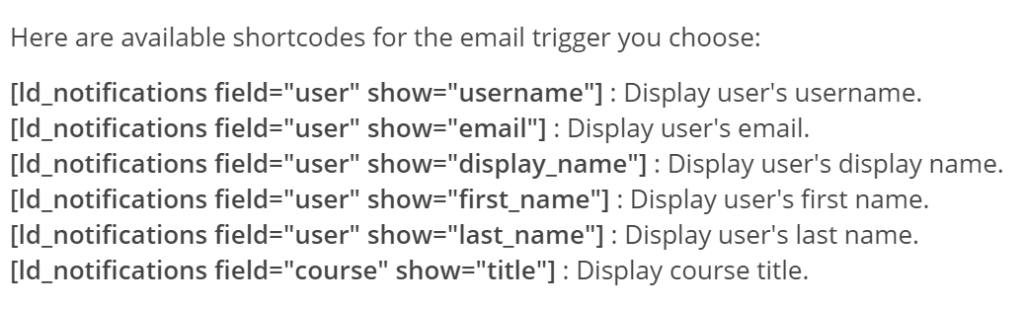
When you select a Trigger, the Available Shortcodes section will update with shortcodes you can use in your notification message (see Step 5).
Below is an example of the shortcodes available for “User enrolls in a course”.
Available Shortcuts:
Recipient
Recipients of the notification emails can be any combination of the following:
– User: The email is sent to the student taking the course.
– Group Leader: The email is sent to the student’s Group Leader(s).
– Admin: The email is sent to the site Administrator.

Delay
By default, messages are sent as soon as the trigger occurs. If you want to set a delay you can do so from this field.

5. Write your notification message
Use the text editor for your email message. You may use the Available Shortcodes in this section to produce dynamic message content. You may also add custom HTML (using Plain-Text mode), photos, and links to customize your Notification.
6. Publish the notification
Please Note: Once you publish a notification, you will not be able to edit the notification trigger. You will still be able to edit the content (text, images, shortcodes, etc.) and email recipients.
How to set up email notifications.
Creating a Group
How to create and manage users and groups
You have the ability to group users together and assign a Group Leader. As the Admin, you can then view reports specific to the group. Group Leaders can communicate and view user course progress of anyone in their group.
When you assign courses to groups, any user who is in the group gets automatically enrolled in the associated course(s). This is useful for several reasons, but some main benefits include:
– The ability to mass enroll users into courses.
– The ability to start a lesson drip-sequence at the exact same time for a large number of users.
– The ability to remove self-enrollment and then control enrollment as the Admin. This is particularly useful when using CMR’s learning module for internal training programs by user role.
Let’s get started:
1. Go to PartnerPortal Dashboard > GROUPS
2. Click ADD NEW
![]()
3. Enter a Group Title

4. Enter a Group Description (optional)
5. Determine if users should be automatically added to the group upon registering for any course that is associated with the group

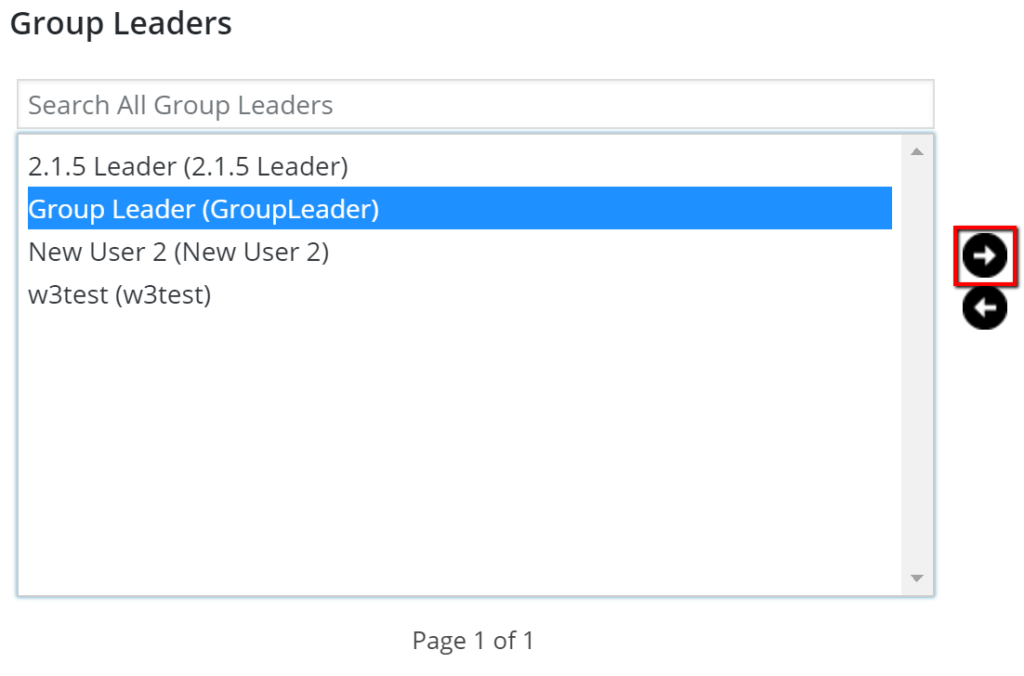
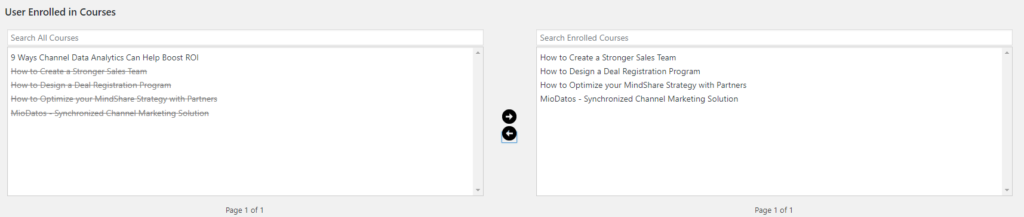
6. Select users that you want to make Leaders and click the Right Arrow button

7. From “Group Users”, select users to put into the group and click the Right Arrow button
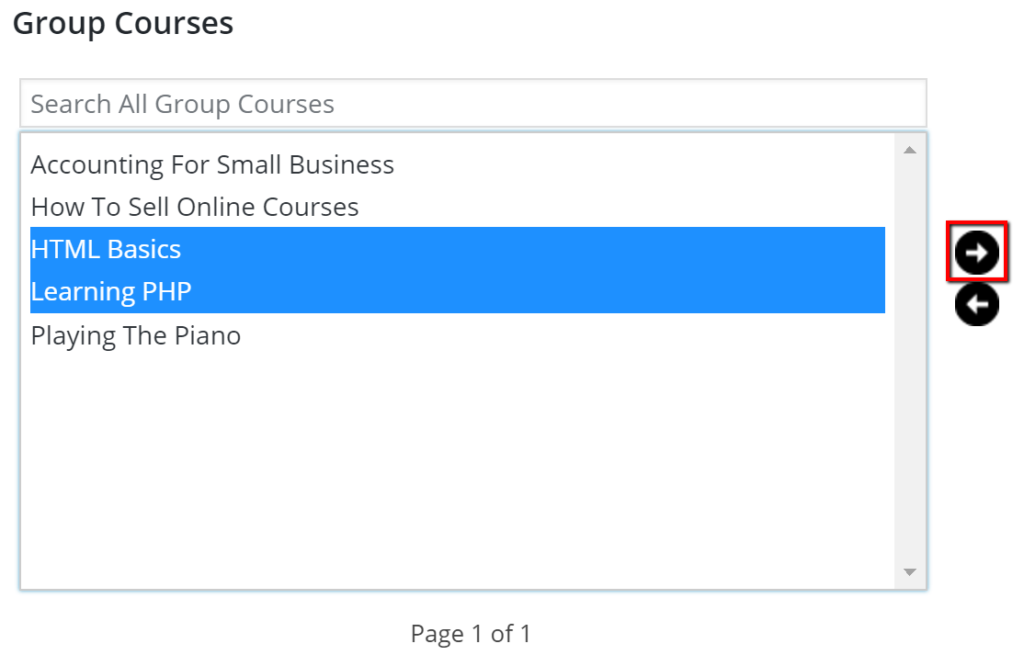
8. Select courses to assign to the group from Group Courses and click the Right Arrow button (optional)
9. Click PUBLISH
How to create and manage users and groups.
Manual Course Enrollment
How to manually enroll a new learner
Enrolling a User (Manually)
Sometimes you will want to enroll a user manually in a course. An administrator can easily do this by using the built-in user management functionality. Follow the steps in this document to enroll (or un-enroll) a user to or from a course manually.
1- From the Admin Dashboard, click on the USERS menu
2- Click ALL USERS
3- Find the desired user from the list, and click EDIT (or click on their name)
4- Scroll down until you see the User Enrolled Courses section
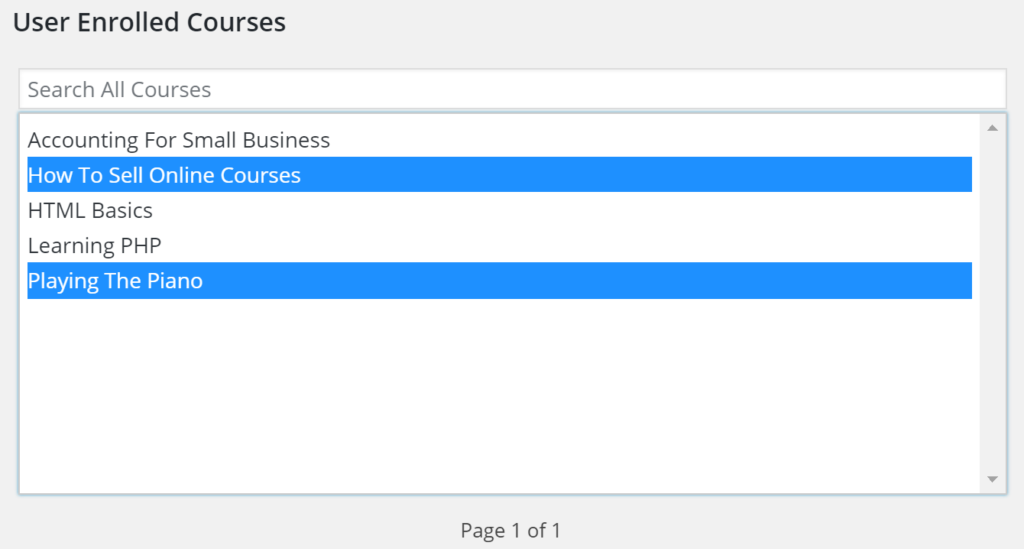
5- Search and select the desired course(s) from the list (hold CNTRL to select more than one)
6- Click the Right Arrow icon to enroll the user in the selected courses
7- Click Update User
How to manually enroll a new learner.
Leaders
How to assign a group leader to a group.
As an admin, you the ability to segment your users into groups, and to assign a Group Leader. The Group Leader role can pull reports on the group, and view individual group member statistics. They also have the ability to email the entire group.
Let’s get started:
1- Go to USERS > ALL USERS
2. Select desired Group Leaders
Select the checkbox next to the user(s) that you want to make a group leader.

3. Select “Group Leader” from the “Change role to” menu
4. Click CHANGE

How to assign a group leader to a group.
Creating a Course
How to create your 1st course
The instructions in this document will walk you through the most efficient way to create a course.
But 1st:
While not required, before creating the first course you may want to configure your Course Options.
To add a new course.
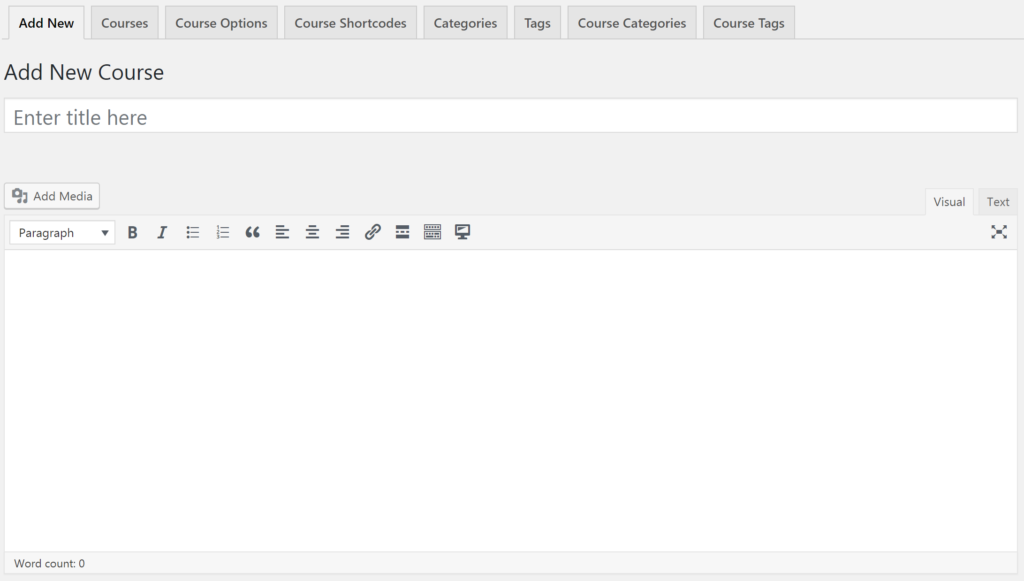
1. Navigate to COURSES > ADD NEW.
2. Enter the title and Description for your course.
3. Select the desired Course Settings.
A detailed description of each option is included below the image.

Course Materials – Enter any materials needed for the course; accepts HTML markup.
Open: User is not required to login or register in order to access the content.
Free: User is required to register and login in order to access the content.
Closed: Can be used for internal training, where only users being manually assigned to the course can have access
Sort Lesson By – Determines how lessons are sorted for the course only. Will override the global setting from LESSONS > LESSON OPTIONS.
Sort Lesson Direction – Determines the lesson direction. This will override the global setting from LESSONS > LESSON OPTIONS.
Lessons Per Page – Determines the number of Lessons that will display on the Course page. The default is 25, meaning that after 25 Lessons, the Course Content table will become paginated. This setting also applies to the Course Navigation widget.
Custom Lessons Per Page – Where you specify a custom number of Lessons you want to appear per page on the paginated Course Content table.
Disable Lesson Progression – When checked, users can take the lessons and quizzes in any order they prefer.
Hide Course Content Table – Only show the Course Content table to enrolled users.
Associated Certificate – Assign a certificate to the course. The certificate is made available on the Course page after successful completion of all course content, including lessons, topics, and quizzes.
4. Add a Featured Image. This is the image that appears on the course page as well as in the Course Grid.
5- Add a Category and/or Tag (optional).
This is useful if you plan to list your courses by category using the Course List shortcode. Learn more about Categories by referencing the Categories & Tags video.
6- Click Publish.
When you click Publish the course becomes visible and available for registration.
How to create your 1st course.
Categories & Tags
How to set up your categories and tags
Setting up your categories and tags become very useful in cases where you have previously uploaded some documents to your portal and you want them to stay separate – that is, not have your Courses, Lessons, or Topics show up in your documents feed. This is where the categories and tags come in. You can create Course, Lesson, and Topic-specific categories and tags inside of each settings page:


1. To create your category or topic, choose your type and click on the tab
2. Next, enter the Category or Tag Name and a description if you’d like (the description is optional).
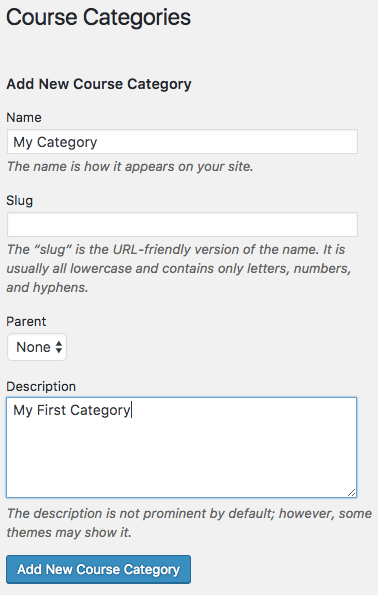
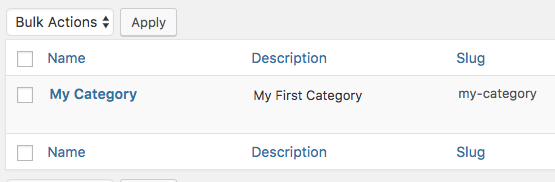
After you’ve entered the information, you should see the Category or Tag appear on the right side, including the slug. The slug is often used to include the Category within a shortcode.
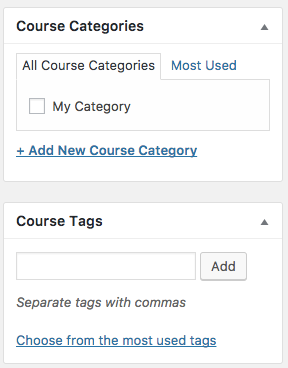
Now, when you create your Course, Lesson, or Topic, you will see any categories you created to the right in the Meta box. You will also be able to choose any tags that have been created. You will notice 2 Meta boxes.
How to assign categories & tags.
Quizzes
How to create quizzes
At any point in your course, you can include a Quiz.
It can be after a Lesson, after a Topic, or it can be assigned as the final task a learner must complete before the course is marked as complete.
Quizzes support 8 unique question types and a large variety of other settings depending on your needs. Quizzes also support multiple forms of media, including text, images, and videos. For example, this means that you can include a video in your question, as well as videos in the various answer choices.
Quizzes are automatically scored upon submission unless the quiz contains an Essay question and manual grading has been activated.
The quiz creation process is done in two parts:
1- Create the quiz and configure core settings
2- Add questions
Let’s start with creating the quiz and configuring the core settings.
Part 1- Creating the Quiz and Configuring the Core Settings
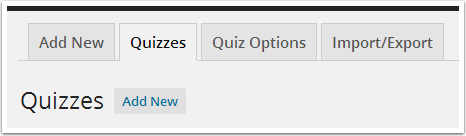
1- Go to your Dashboard > QUIZZES

2- Click ADD NEW
3- Enter a Title
4- Enter a Description or Instructions
5- Configure the Core Settings
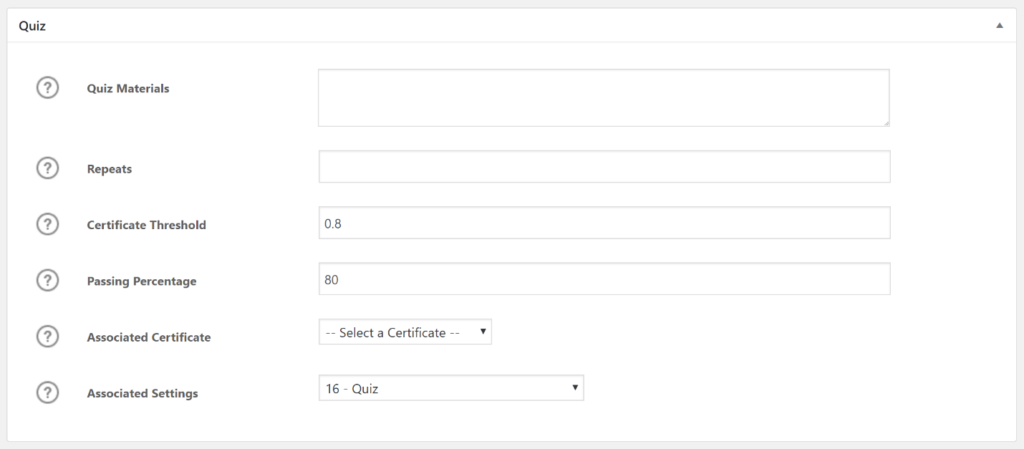
a. Quiz Materials – Optional place to include a list of materials for the quiz.
b-Repeats – Number of times a user can take the quiz.
c- Certificate Threshold – Percentage that must be obtained to earn a certificate (set to “1.1” if you don’t want to issue certificates).
d- Passing Percentage – Percentage that must be obtained to pass the quiz.
e- Associated Course – Course that the quiz is assigned to.
f- Associated Lesson – Lesson or Topic that the quiz is assigned to (Optional)
g- Associated Certificate – Certificate that is delivered when the threshold is met.
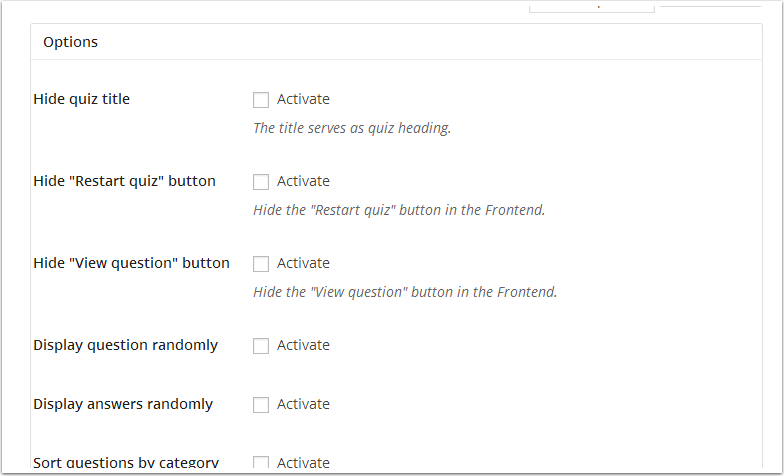
6- Configure Optional Settings
Core Settings are the Optional Settings. Each option has a description providing additional detail as to what happens if the option is selected.
7- Click Publish
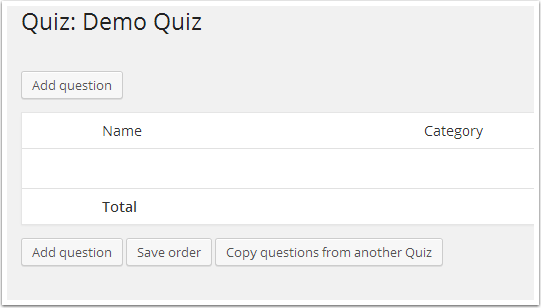
Part 2 – Create Quiz Questions
1- Click on the QUESTIONS Tab
This tab becomes visible after you SAVE or PUBLISH your quiz settings.

2- Click ADD QUESTION
Alternatively, you can click COPY QUESTIONS FROM ANOTHER QUIZ to copy already created questions.
3- Enter the Question
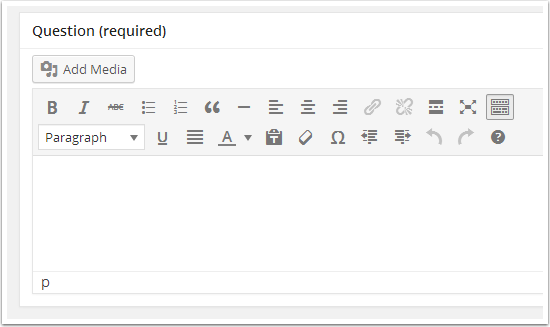
4- Select an Answer Type

5- Enter Possible Answer Selections
This will look different depending on which option you choose.
6- Click SAVE
The question is saved. Repeat as necessary.
How to create a quiz for a lesson and course.
Course Points
How to award points to learners
Now that you have your course set-up you have the capabilities to add points.
Enabling Course Points
Activates the awarding of points for users when they complete a course.
Here’s how to setup “Course Points”:
1. Navigate to Portal Dashboard > COURSES
2. Click “Add New” or “Edit” if you wish to add points to an existing course
3. Enter a Title and Description for your course (not necessary if you are editing a course)
4. Scroll down to “Course” setting
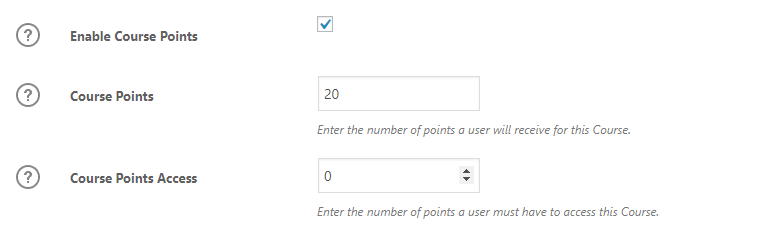
5. Select “Enable Course Points”
Course Points: The number of points a user earns upon successful course completion.
Course Points Access: The number of points a user must have in order to enroll in the course.
6- Click Publish or Update if the courser has already been published
How to award points to learners.
Lesson Timer
How to prevent learners from moving through the course too quickly
When creating a lesson, you are given the option to apply a “Forced Lesson Timer” on your lesson.
You are basically setting a minimum time a user has to spend on a Lesson page before it can be marked complete.
Here are the steps for setting up lesson timer:
1- Navigate to Portal Dashboard > Lessons.
2- Click “Add New” or “Edit” if you wish to add a lesson timer to an existing lesson.
3- Enter a Title and Description for your lesson (not necessary if you are editing an already published lesson).
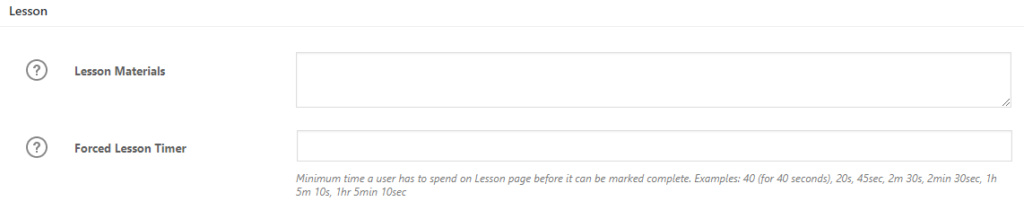
4- Scroll down and select “Forced Lesson Timer”
5- Enter the time requirements. Examples: 40 (for 40 seconds), 20s, 45sec, 2m 30s, 2min 30sec, 1h 5m 10s, 1hr 5min 10sec
6- Click Publish or Update if the course has already been published
How to prevent learners from moving through the course too quickly.
Building a Lesson
How to create your 1st lesson.
Now that you have your course set-up and the outline created, it’s time to start adding content.
You can add the following to your courses:
1. Lessons
2. Topics
Let’s begin with adding content to the course using Lessons.
1. Go to Dashboard > LESSONS
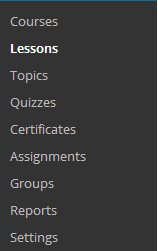
2. Click ADD NEW, or EDIT
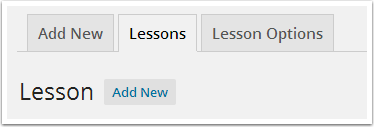
3. Enter a lesson Title

4. Add Your Lesson Content
Enter lesson material in the text editor.
5. Determine Your Lesson Settings
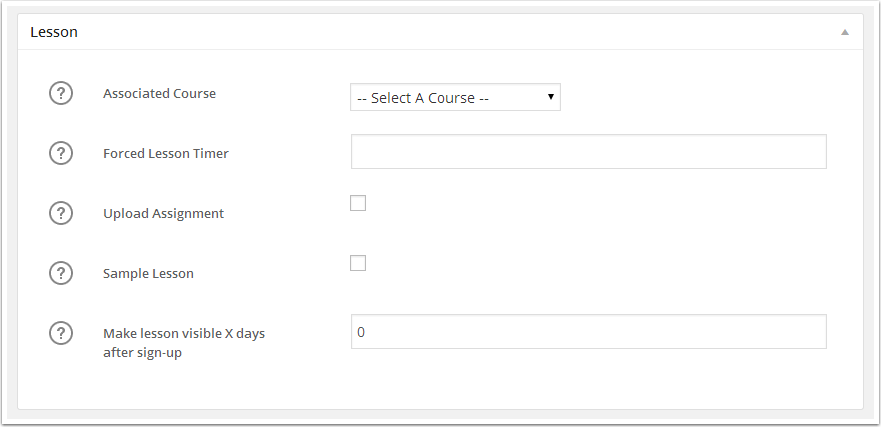
Here is where you determine your desired Lesson settings.
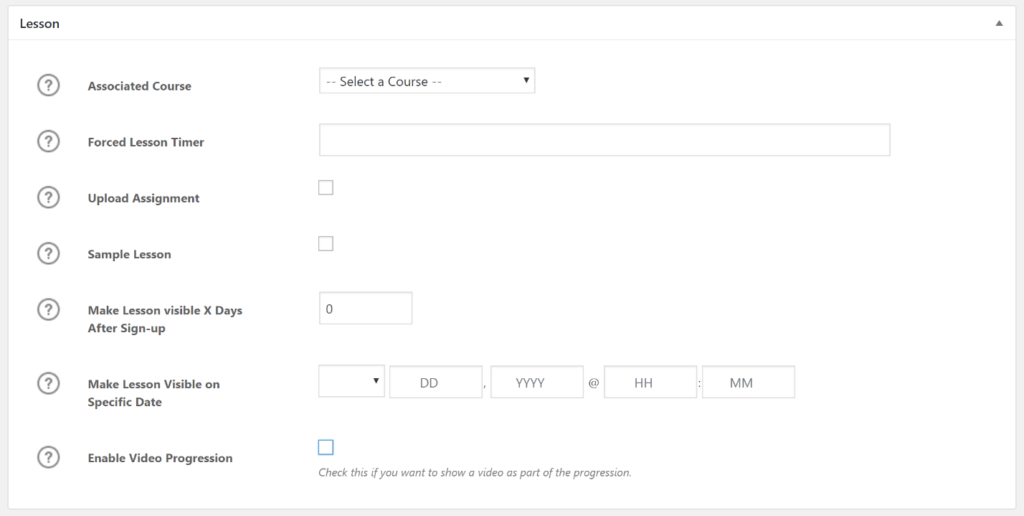
a. Associated Course – Associates the lesson to a course.
b. Forced Lesson Timer – Requires a user to stay on a lesson for a specific amount of time. The MARK COMPLETE button is not active until the timer reaches zero (optional). If the user leaves the page, the timer will pick up from where it was at when the user left the page.
c. Upload Assignment – When checked, the MARK COMPLETE button is replaced with a field for the user to upload a document. The user cannot progress until the Administrator marks the assignment as complete. Admins can mark an assignment as complete, or delete it, by logging in and navigating to the lesson page (optional).
d. Auto Approve Assignment – When checked, all submitted assignments are approved without the need for the Admin to review first.
e. Sample Lesson – Makes lesson accessible to visitors prior to enrollment.
f. Make Lesson visible X days after sign-up – Allows you to specify when the lesson is available for viewing (in days). The timer begins after a user enrolls in the course.
g. Make Lesson visible on Specific Date – Allows you to specify when the lesson is available for viewing on an exact date & time.
h. Enable Video Progression – Enables extra options for video-based lessons content.
i. Video URL – The URL of your video. Supported platforms include YouTube, Vimeo, Wistia, Amazon S3 and any video uploaded to your Media files.
ii. Auto Start Video – When selected the video will automatically play upon page load.
iii. When to Show Video – Option to determine if a video is shown before or after associated Lesson Topics.
iv. AutoComplete Lesson – Mark the Lesson as complete at the end of the video.
-AutoComplete Delay – Option to delay the autocomplete functionality.
-Hide Mark Complete – Option to hide the Mark Complete button.
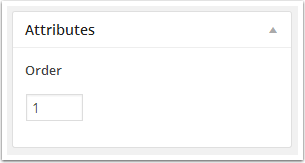
6. Set Lesson Order (Optional)
Set the lesson order from the Attributes box.
7. Add a Featured Image (Optional)
8. Click PUBLISH, or UPDATE if the Lesson is already published
How to create your lessons.
How to create assignments.
Quiz Question Types
How to add different question types to a quiz
In this document, we will review the different types of questions that can be added to a quiz. Please note that images, video, and other media are supported in both the question and answer fields.
The following question types are supported:
1- Single Choice
2- Multiple Choice
3- “Free” Choice
4- “Sorting” Choice
5- “Matrix Sorting” Choice
6- Fill in the blank
7- Assessment
8- Essay / Open Answer
1- Single Choice
This question type can only have any number of potential answers, but only one correct answer. This is the most common question format for standardized tests. This is the question type to use for True or False questions as well.

2- Multiple Choice
Just like the Single Choice option, Multiple Choice can have any number of potential answers. However, unlike the Single Choice option, the Multiple Choice supports multiple correct answers.
In order for the question to be marked as correct learners must select ALL of the correct answers. If they only select some correct answers then the question is marked as incorrect.

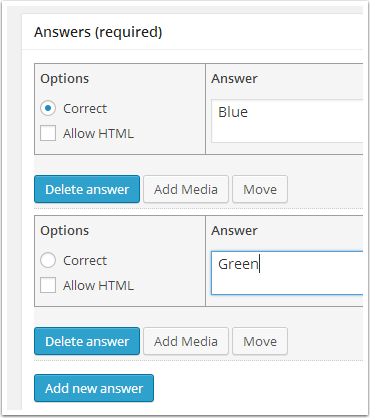
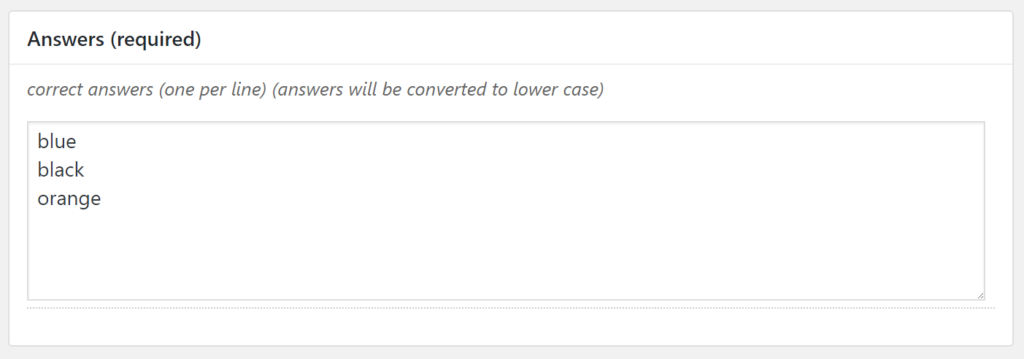
3- Free Choice
This question type presents a learner with a field where they must enter the correct word(s). For example, if the question was, “what color is the sky?” then you can accept multiple answers as correct. In the image above, the question is marked as correct if the learner enters any of those potential options.
Possible answers can be more than one word long.
Capitalization is not scored. One learner can enter “Blue” and another can enter “blue”. Both will be scored as correct.
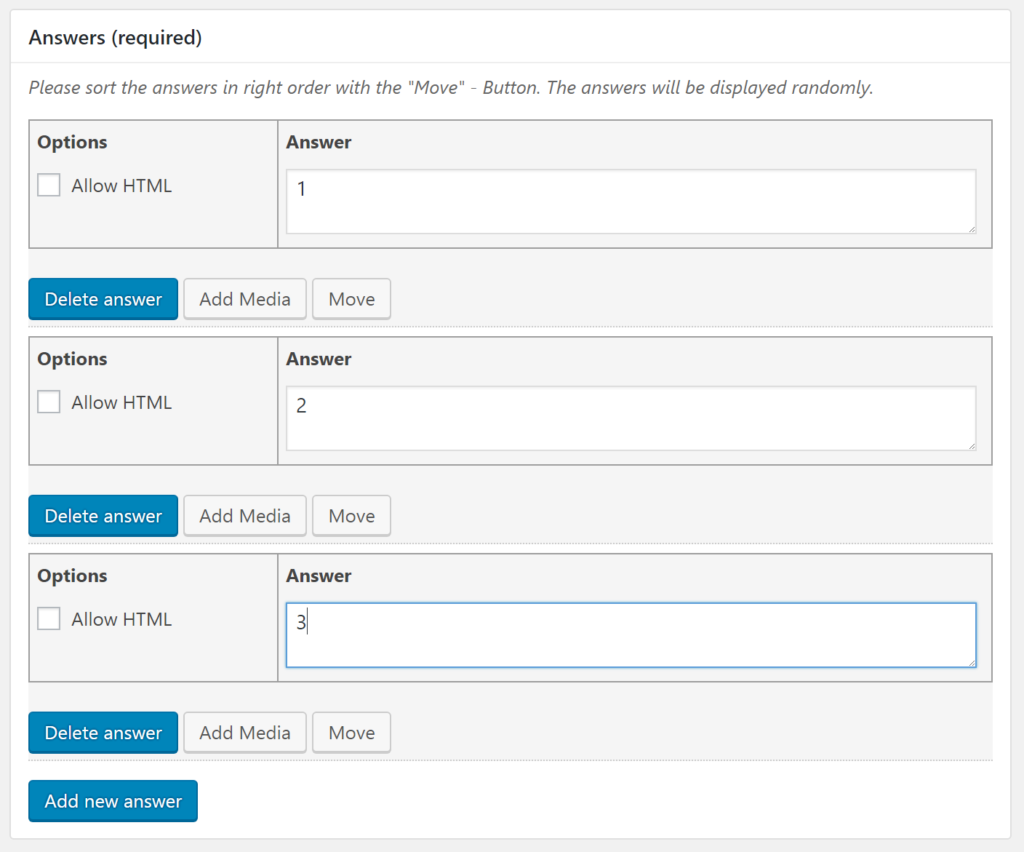
4- Sorting Choice
If you want a learner to sort a set of potential answers in a correct order, then the Sorting Choice question type should be used.
The order you enter the answers when creating the question will be considered the correct order.
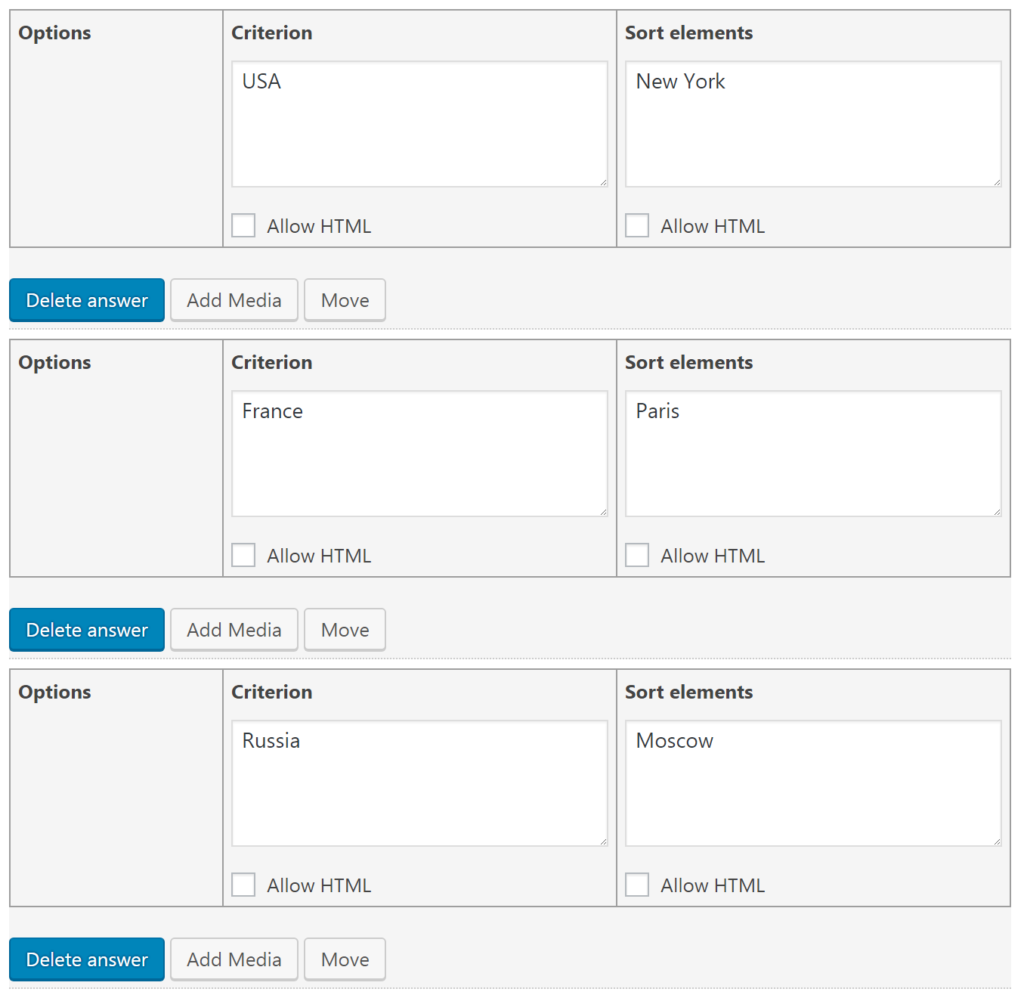
5- Matrix Sorting Choice (Matching)
If you want learners to match two items together then you will use the Matrix Sorting Choice question type. The elements entered in the Criterion field cannot be moved and are static. The elements in Sort elements field are what learners will drag-and-drop to the matching criterion.
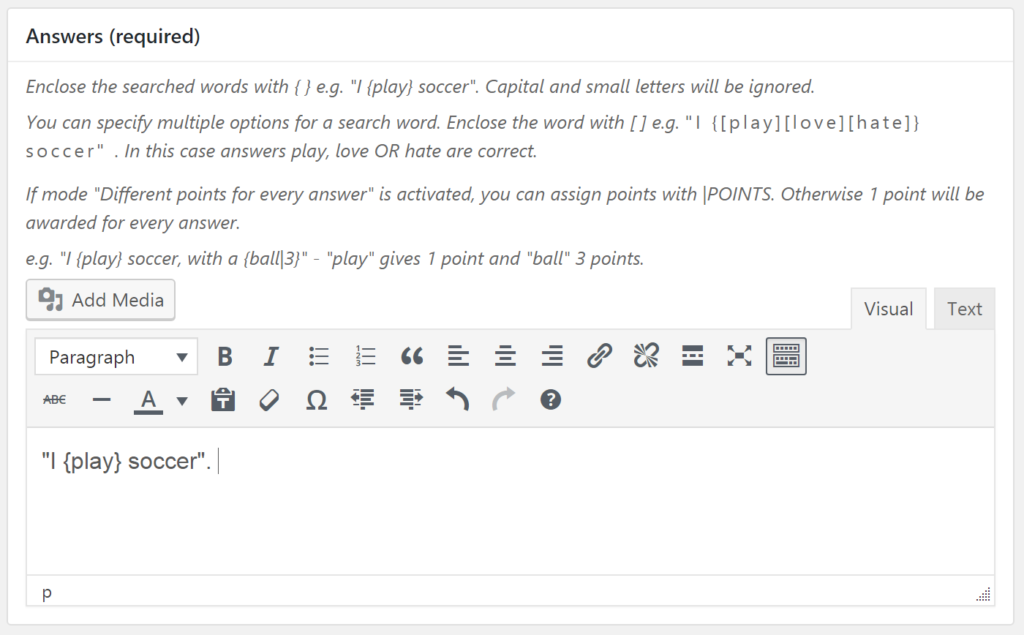
6- Fill in the Blank
This question type will insert a blank line in the middle of a sentence. Learners are then required to type the correct answer into this empty field. If more than one “blank” exists in the question, then both must be correctly answered in order for the entire question to be marked as correct.
Example Format:
“I {play} soccer”.
This will show as: “I ____ soccer” for the learner. They must enter “play”. Capital and small letters will be ignored.
You can specify multiple options for a correct answer, just enclose the word with [ ]
“I {[play][love][hate]} soccer” . In this case answers play, love OR hate are correct.
If the “Different points for every answer” option is activated, you can assign points by using the format below, otherwise 1 point will be awarded for every answer.
“I {play} soccer, with a {ball|3}”. In this case “play” gives 1 point and “ball” 3 points.
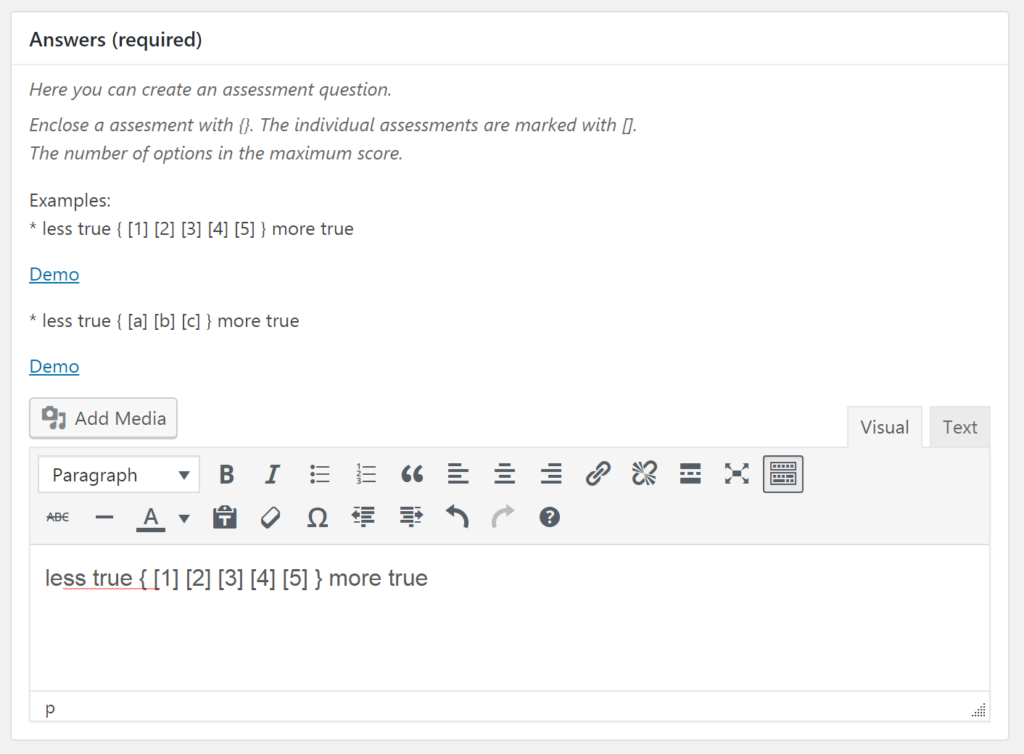
7- Assessment (Survey)
Assessment question types allow for Likert scale questions. That is, questions that ask learners to rate something along a continuum.
Enclose an assessment option with “{}”. The individual assessments are marked with “[]”.
The number of options is the maximum possible score.
Examples:
* Less true { [1] [2] [3] [4] [5] } more true
* Less true { [a] [b] [c] } more true
In the first example, the maximum number of points is 5.
In the second example, the maximum number of points is 3.
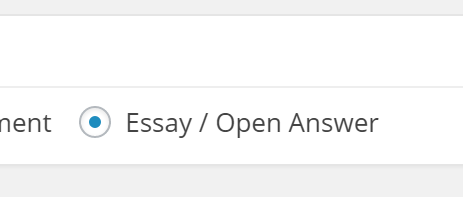
8- Essay / Open Answer
Essay questions allow for any answer. They are graded automatically or manually depending on the settings.
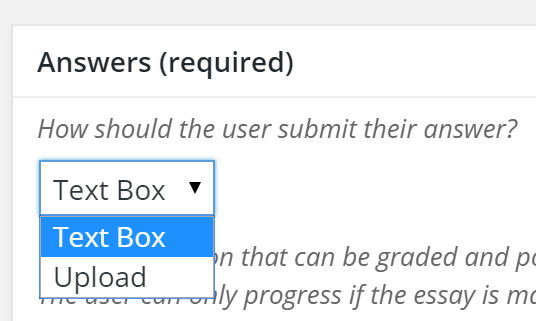
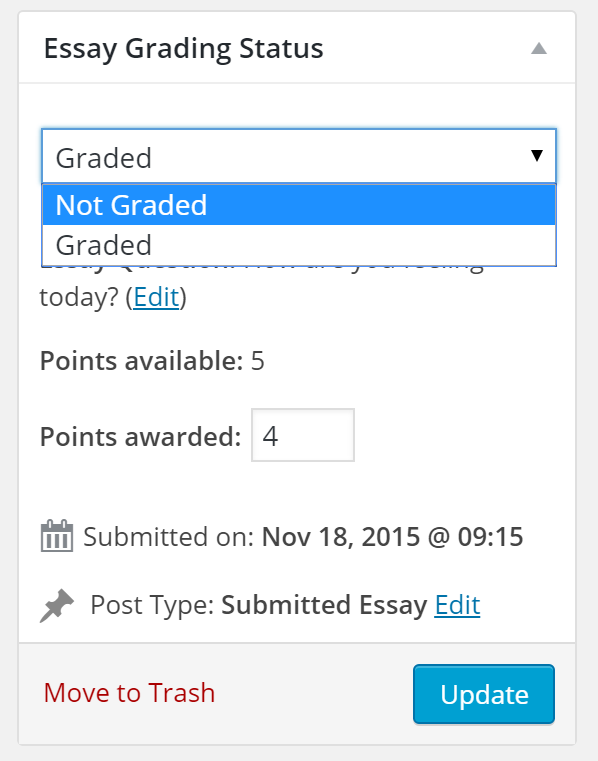
The final (but most important) setting for essays is how they are to be graded at the immediate completion of quiz. You will see the following options via a drop-down menu:

Using this drop-down, you can determine whether you want to allow the user to continue in the course, or wait until you have officially scored the quiz. Below is a description of what you can expect from each selection:
Not Graded, No Points Awarded –The essay question is submitted and awaiting grading. Final quiz grade presented to learner is displayed as “Pending”.
Not Graded, Full Points Awarded –Essay status is “Not Graded”, but full points are awarded. You can filter by “Not Graded” essays to grade them at a later date.
Graded, Full Points Awarded –Essay status is “Graded” and full points are awarded.
IMPORTANT: If no points are awarded for the essay, this (temporarily) counts against the final score. If the total points obtained from the other questions meets the passing threshold, the user can continue with the course. However, if they do not earn enough points to meet the passing threshold then they will not be able to continue.
When an essay is complete for a quiz, you can find it under QUIZZES > SUBMITTED ESSAYS
If you previously set the grading of the essay to Not Graded, No Points Awarded, then the status and grade of the quiz will no longer be in Pending status after you award points and indicate that the essay is graded.
If the user did not meet the passing threshold prior to grading but after grading of the essay they meet the threshold, then they will be permitted to continue with the course.
How to add different question types to a quiz.
Expiration
How to add limited time access to a course
When creating your course, you are given the option to place an access expiration date on your course.
Setting an expiration date to access a course will automatically remove course access after a set number of days (based on enrollment date).
Here’s how to setup “Expire Access”:
1- Navigate to Portal Dashboard >Courses
2- Click “Add New” or “Edit” if you wish to change access to an existing course.
3- Enter a Title and Description for your course (not necessary if you are editing a course).
4- Scroll down to “Course” setting
5- Select “Expire Access”

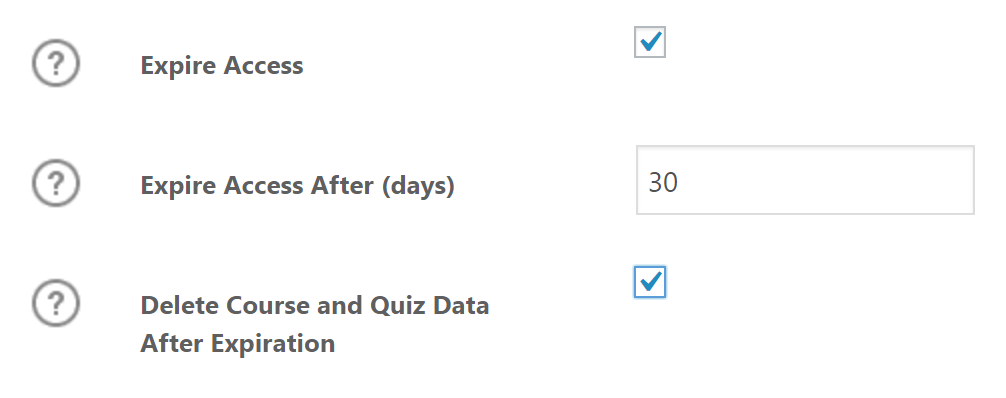
Once “Expire Access” box is clicked you are given 2 options:
1- Expire Access After (days):
a. Where you enter the number of days a user has access to this Course.
2- Delete Course and Quiz Data After Expiration
a. Select this option if you want the user’s Course progress to be deleted when their access expires.
6- Click Publish or Update if the course has already been published
How to add limited time access to a course.
Prerequisites
How to determine which courses need to be taken
When creating your course, you are given the option to place a prerequisite on your course.
Enabling Course prerequisites
By enabling prerequisites you are requiring that one (or more courses) are completed first before a user can enroll in this course.
Here’s how to setup “Prerequisites”:
1- Navigate to Portal Dashboard > COURSES.
 2- Click “Add New” or “Edit” if you wish to change access to an existing course
3- Enter a Title and Description for your course (not necessary if you are editing a course)
4- Scroll down to “Course” setting
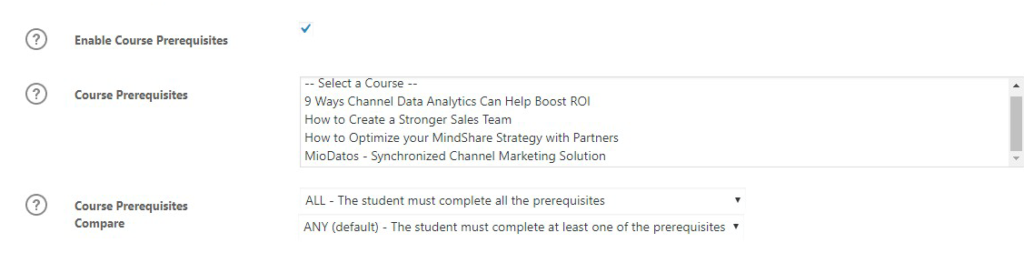
5- Select “Enable Course Prerequisites”
– Course Prerequisites: Where you select the prerequisite course(s), hold CTRL to select more than one.
– Course Prerequisites Compare: Choose whether ALL selected course prerequisites must be complete or ANY of the selected courses.
6- Once “Expire Access” box is clicked you are given 2 options:
a. Expire Access After (days):
i. Where you enter the number of days a user has access to this Course.
b. Delete Course and Quiz Data After Expiration
i. Select this option if you want the user’s Course progress to be deleted when their access expires.
7- Click Publish or Update if the course has already been published
How to determine which courses need to be taken and in what order.
Building a Topic
How to create your topics
If you want to further break-up the content of your Lessons, then you can do so using Topics. Just like you can create an unlimited number of Lessons for a Course, a Lesson can have any number of Topics.
Using Topics is particularly useful if you have a lot of content for your Lessons. By dividing the Lesson into smaller “chunks”, your learners won’t feel overwhelmed by the material.
Topics adopt the same progression functionality as Lessons. If you require Lessons to be completed in a chronological order, then Topics also must be completed in chronological order. A Lesson cannot be marked complete until all Topics have been marked as complete.
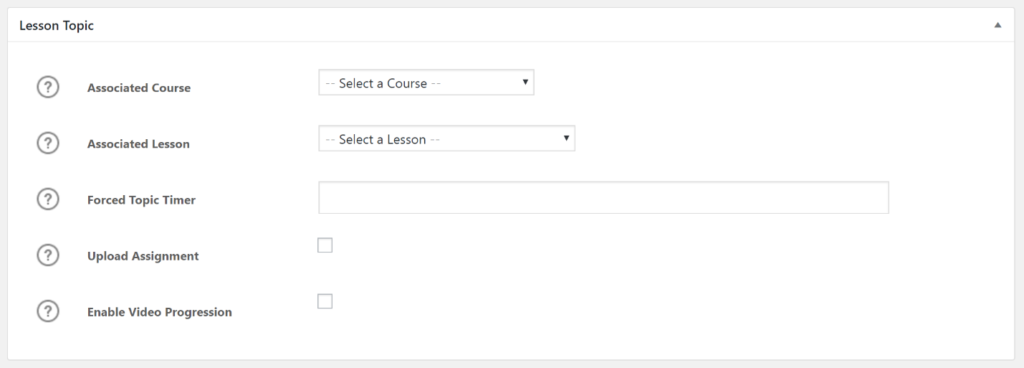
Associated Course – Select which course this topic will be part of. When you select the course, the Associated Lesson list will populate with applicable lessons. This is done automatically if you used the Course Builder.
Associated Lesson – Assign the lesson topic to a specific lesson. This is done automatically if you used the Course Builder.
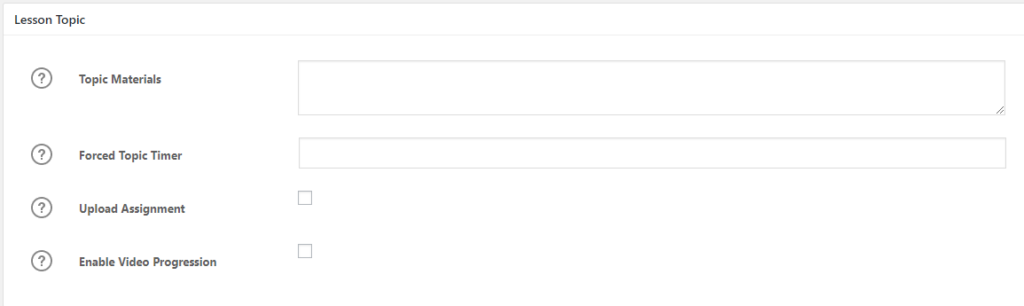
Topic Materials – An optional place to include a list of materials for the topic.
Forced Topic Timer – Requires a user to stay on a lesson for a specific amount of time. The MARK COMPLETE button is not active until the timer reaches zero (optional).
Upload Assignment – When checked, the MARK COMPLETE button is replaced with a field for the user to upload a document. User cannot progress until the Administrator marks the assignment as complete. Admins can mark an assignment as complete, or delete it, by logging in and navigating to the lesson topic page (optional).
Auto Approve Assignment – When checked, all submitted assignments are approved without the need for the Admin to review first.
Enable Video Progression – Enables extra options for video-based lessons content.
a. Video URL – The URL of your video. Supported platforms include YouTube, Vimeo, Wistia, Amazon S3, and any video uploaded to your Media files.
b. Auto Start Video – When selected the video will automatically play upon page load.
c. When to Show Video – Option to determine if video is shown before or after associated Lesson Topics.
d. AutoComplete Lesson – Mark the Lesson as complete at the end of the video.
e. AutoComplete Delay – Option to delay the autocomplete functionality.
f. Hide Mark Complete – Option to hide the Mark Complete button.
How to create your topics.
Managing Assignments
How to manage assignments
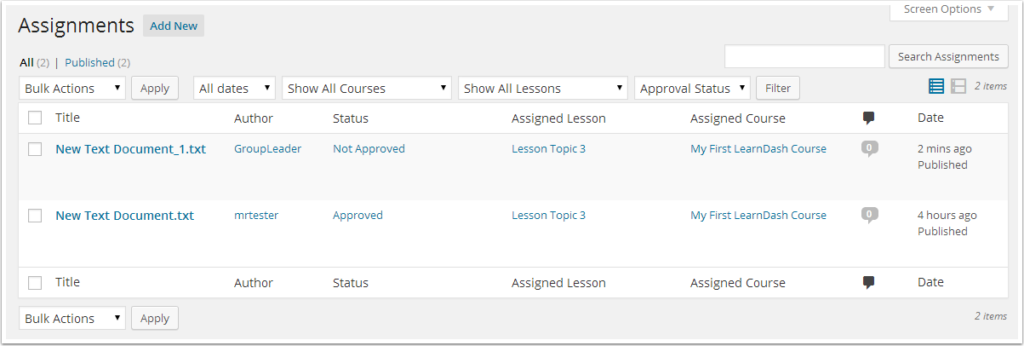
1- Go to Portal Dashboard > ASSIGNMENTS
2- A list of submitted assignments will display
This page shows the list of the submitted assignments. Here you can:
– Download assignments
– Approve assignments
– Delete assignments
– Leave comments/feedback on the assignment for the user
– Assign points to assignments
To do any of these actions, simply click EDIT for the desired assignment. You can approve and assign points from this menu as well.
How to manage assignment.
How to copy an existing quiz using templates.
Video Progression Setting
How to enable the video progression feature
If you are using videos in your courses then you have the option to enable the video progression feature for your Lessons and Topics.
You activate this functionality on the LESSON and/or TOPIC pages in your course.
1- Scroll down to Lesson Topic Setting
3- Click PUBLISH, or UPDATE if the Lesson is already published
How to enable video progression.
Drip-Feed Content
Drip Feed (Schedule) Lessons
How to schedule your lessons over a specific period of time
About Drip Feeding
Drip feeding lessons (also known as “scheduling”) is a way for you to deliver your course content on a pre-defined schedule. This has many advantages, mainly being that you can control the learning experience for your users.
How it Works
In CMR’s learning module, the scheduled lesson sequence begins when someone registers for the course. At this point, the clock begins, and your lessons will be released accordingly to the specified number of days AFTER sign-up you have configured.
Here are the instructions for creating Drip Feed lessons:
1- Create your lesson title and content
Reference the Adding Course Content article for more detail.
2- Below the text editor, you will find the Lessons Meta box
3- Find the field titled “Make lesson visible X days after sign-up”

4- Specify when you want the lesson to become available (in days)
The timer begins after a user clicks the Take This Course button

5- Set a specific date when the lesson should become available

6- Specify the lesson order
7- Click Publish
How to schedule your lessons over a specific period of time.
Shortcodes
How to use shortcodes
You may use shortcodes to add information to any page/course/lesson/quiz. To insert a shortcode, you can use the Shortcode Wizard button in your text editor.
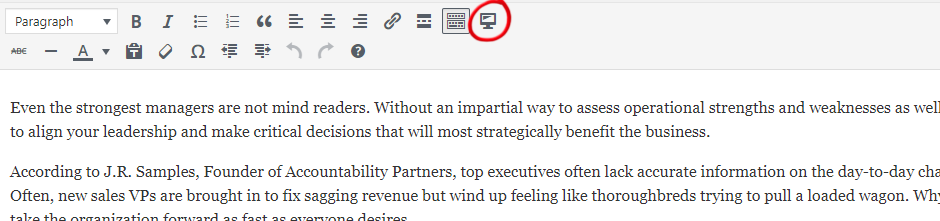
When selecting this button, the wizard will display:
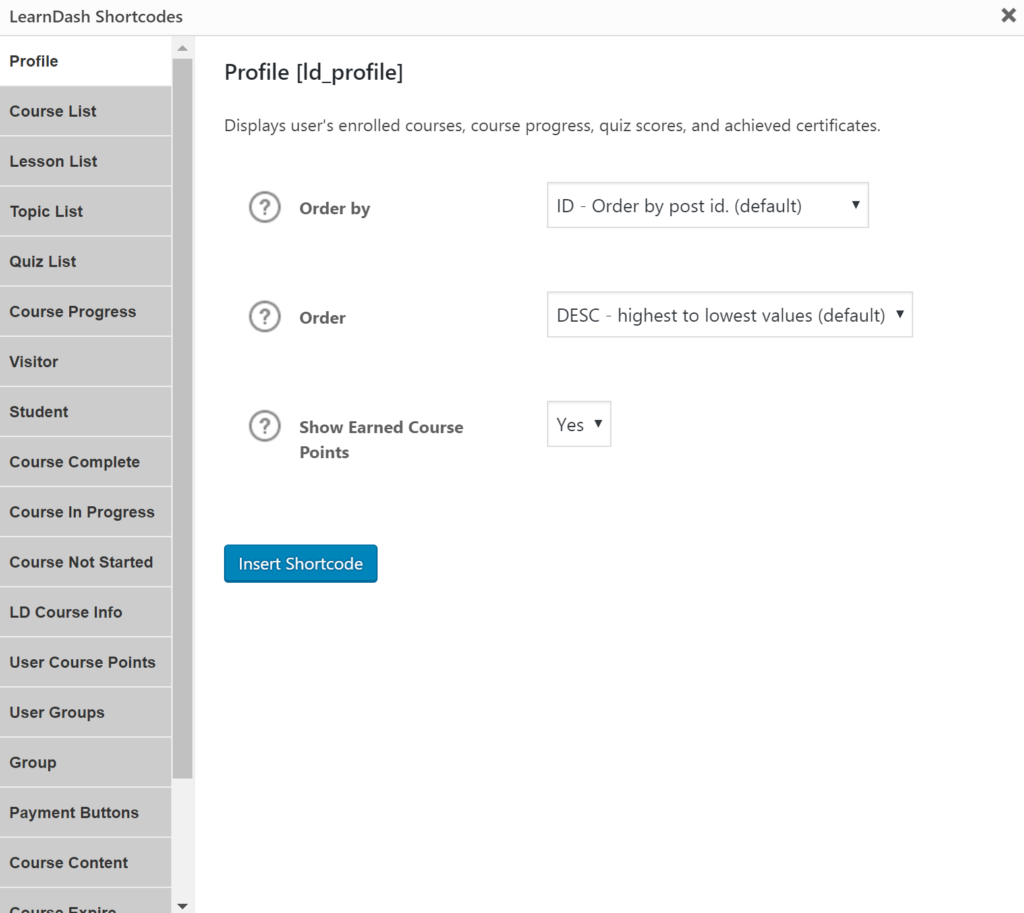
The menu on the left contains the available shortcodes.
When you select one of these shortcodes the panel on the right will update with a description and options. Select your desired options and click the “INSERT SHORTCODE” button. This will insert a properly formatted shortcode into your text editor.
While shortcodes are strictly optional, the most commonly used ones are the Profile shortcode (which creates a front-end profile for learners), and the Course List shortcode.
How to use shortcodes.
Certificates
How to create a certificate
In this document, we cover the steps for creating your first certificate.
Certificates can be awarded for:
- Meeting the certificate threshold for a quiz
- Completing all steps (lessons, topics, quizzes) for a course
When a certificate is assigned to a quiz, it becomes available when the quiz is complete and the certificate threshold has been met. The “Print Certificate” button will appear on the quiz results page and in the LearnDash profile.
When a certificate is assigned to a course, it becomes available when all the components of the course have been marked as complete. This includes lessons, topics, assignments, and quizzes. The “Print Certificate” button will appear on the Course page.
1. Create a Certificate Template
Create a template in your favorite image editor (i.e. Adobe Photo).
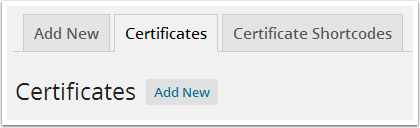
2. Go to DASHBOARD > CERTIFICATES
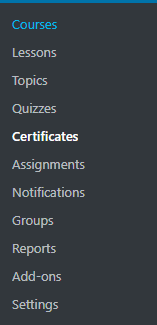
3. Click ADD NEW
You can click the tab or the button.
4. Enter a Certificate Title

5. Click on the TEXT tab
All the text you enter on your certificate should be entered into the text tab to avoid errors in formatting.
6. Enter desired Certificate text
Enter the text and/or certificate shortcodes you would like to use. Available certificate shortcodes can be found in the text editor [Id].
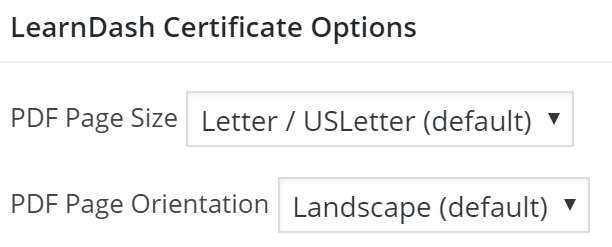
7. Choose desired certificate Size and Orientation
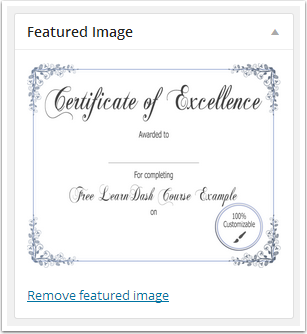
8. Upload a Featured Image
Optimal size is 8.5 by 11 inches (21.5cm x 28cm). Please use a .jpg file, as other file types will cause an error.
9. Click PUBLISH
10. Preview the Certificate.
To preview your certificate, first, you must assign it to a Quiz or a Course.
– For assigning to a quiz, go to the desired quiz and choose the certificate from the “Associated Certificate” drop-down menu.
– For assigning to a course, go to the desired course and choose the certificate from the “Associated Certificate” drop-down menu.
Next, complete the quiz/courses so that you are presented with the “Print Certificate” button. When you select this button the certificate will render in a new browser window as a PDF file. This is the way your certificate will appear for your users.
How to create and customize a certificate.
How to add a resume button to your course, lesson, topic, or quiz.
Labels
How to change the default labels
If you want to change the default labels, you can do so from your dashboard “setting page”. Each field corresponds to the applicable label.
For example, if you update “Lessons” to “Modules”, then anywhere the word “Lessons” was used will be changed to “Modules”.
On the top of the page, select Custom Labels
Change the labels that you wish to change
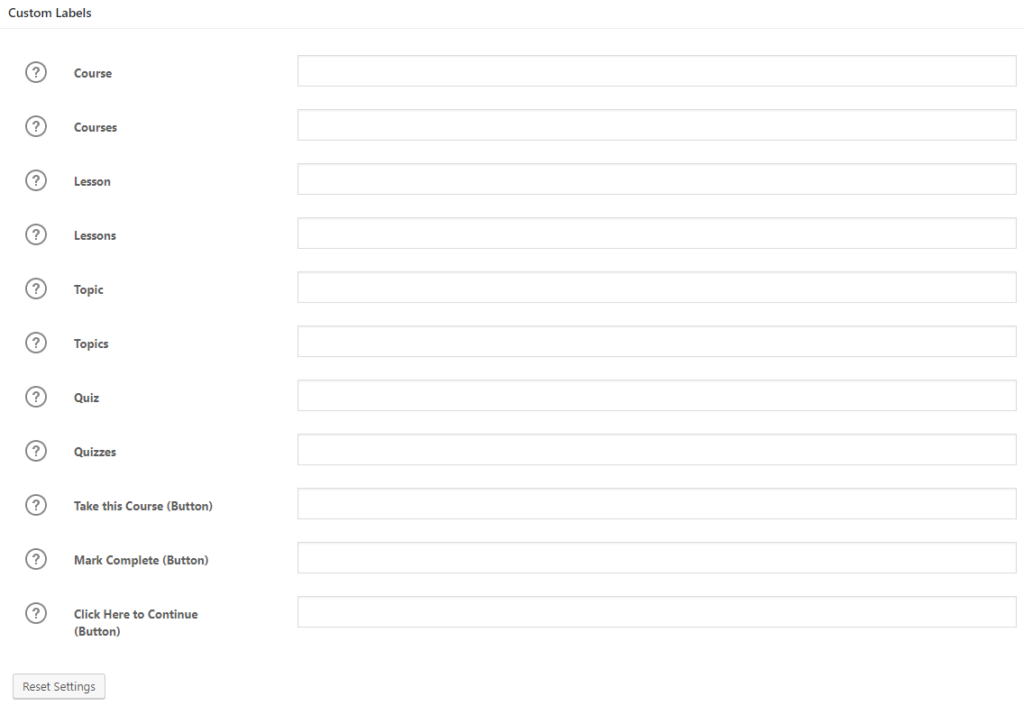
Once done click Save Options 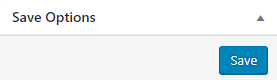
How to change the default labels.
How to print and reprint earned certificates.
Viewing Essay Comments
How a non-admin user can view comments
There are currently two ways the non-admin user can see the comments.
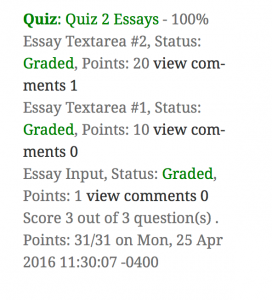
1. Via the Dashboard profile
Within the profile, CMR’s module adds the Quiz information. This information will show if the quiz essay has been graded.

2. Profile Widget
When the admin makes a comment the user will receive an email. Within the email will be a link to the front-end essay item.
How non-admins can view essay comments.
How to display a list of learner’s certificates.
Reports
How to access reports and monitor the progress of a user or a group
By default, your dashboard will only be visible to Admins and Group Leaders.
- Admins will see all data
- Group Leaders will only see data relating to the groups that they manage
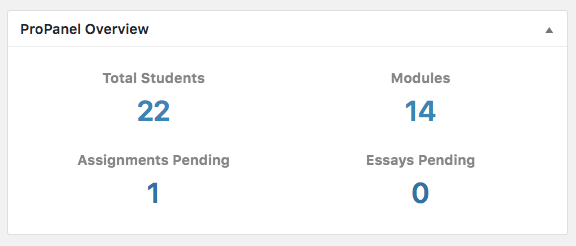
Once logged in to your training dashboard you are able to see 4 reporting widgets.
Reporting Widgets Overview:
The reporting widgets display the number of students, courses, and pending assignments and pending essays (to be approved by admin or group leader). Each item is a clickable link that will let you view the selected section in more details.
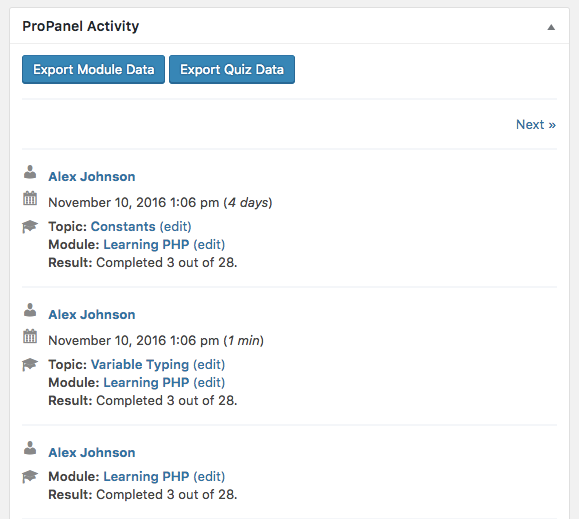
Activity Widget:
This widget displays real-time activity. Supported activities include course completion, lesson and topic completion, and quiz completion. Associated data such as timestamp, score, and steps will be displayed when applicable.
You can also export course and quiz reports via the buttons at the top of the widget. These reports will include the filtered data only.
Admins will be able to view all user activity while Group Leaders can only view the activity of users who are in their group(s).
Reporting Widget:
This widget enables you to view reports filtered by course, user, and/or group. You can use any combination of these filters to narrow down your results. Below are some examples.
User Filter > Select a user > Select a progress status
This generates a list of courses in which that specific user is enrolled, along with progress statistics for those courses.
Course Filter > Select a course > Select a progress status
This generates a list of users enrolled in the selected course, along with progress statistics for each user.
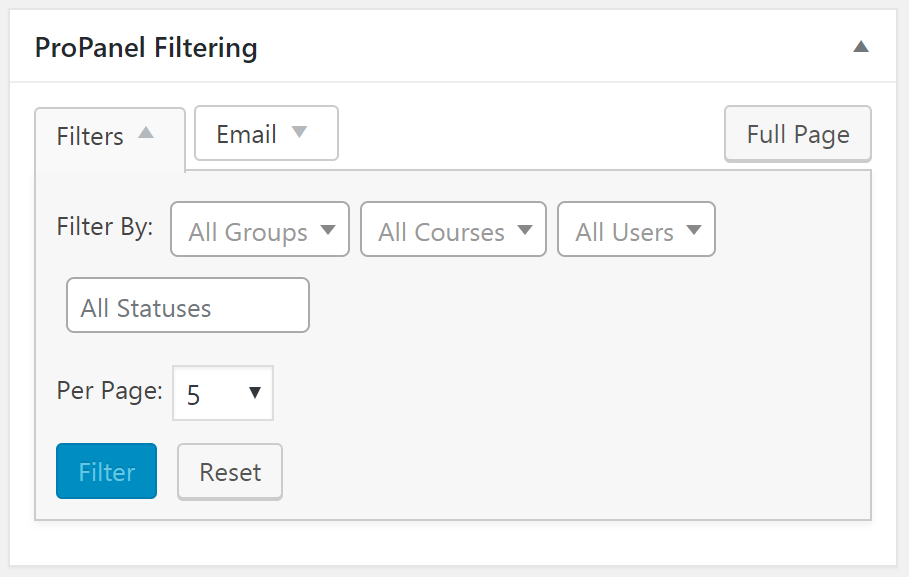
Additional Options:
- Email lets you communicate with the users selected in the Filters section.
- Pagination will control the output of both lists in the Reporting widget as well as the Activity widget.
- Full Page will take you to a full page view of the Reporting widget for a distraction-free and full-width environment.
How to access reports and monitor the progress of a user.
Export
How to export a CSV report of learner’s course and quiz data
The exporter is used to generate and export a CSV report of a learner’s course and quiz data.
Below are the steps for exporting a list of your graduates:
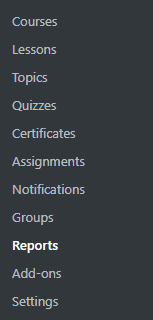
1. Go to your Dashboard > Reports
2. Select the report you wish to export
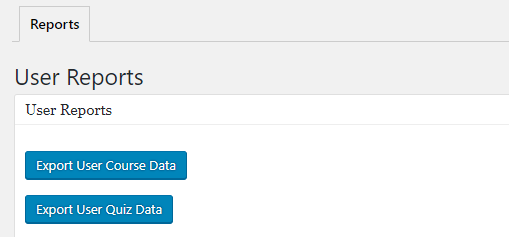
3. A CSV format report will automatically download
4. Your report will look something like the image below
![]()
![]()
How to generate and export a CSV report.
Where to find a user or a group’s course-related data.
How to capture your SCORM and Tin Can data.
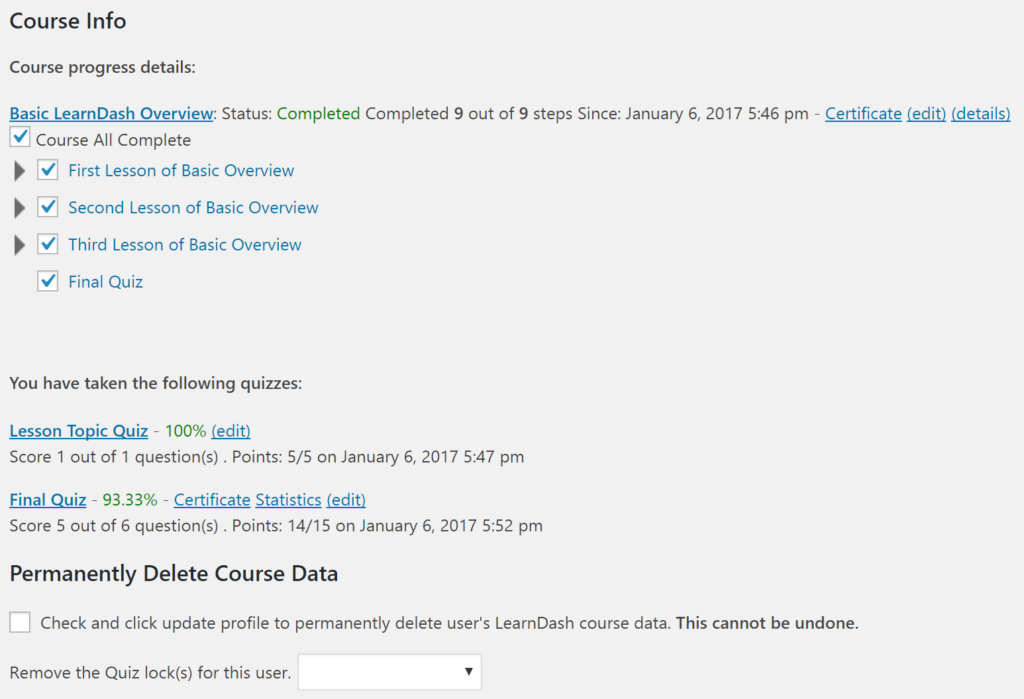
Deleting Course Data
How to permanently delete a user’s course data
Process Steps
- From the Administration Dashboard, click on USERS.
- Search for the desired user.
- Click Edit.
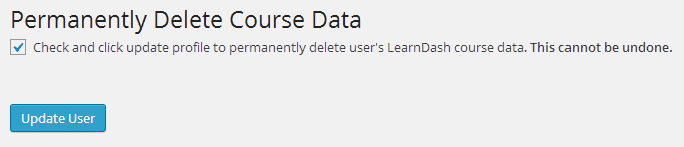
- Scroll to the bottom of their profile and select the checkbox under Permanently Delete Course Data.
- Click the Update User
Note: This cannot be undone.
Automatically Deleting Course Data
Select the following options on the EDIT COURSE page if you want to automatically un-enroll and delete a user’s data after a certain number of days.
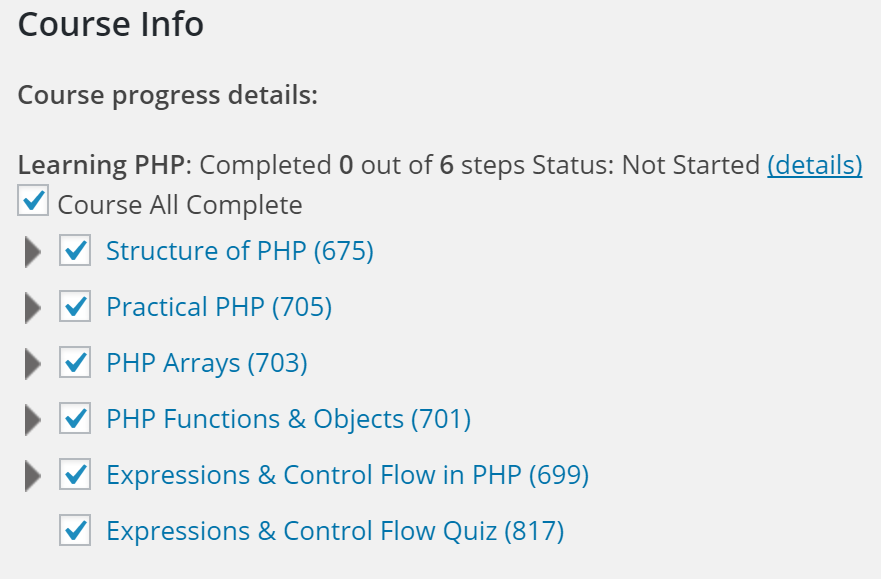
Deleting a Selection of Course Data
If you would like to delete progress for a specific course item for a user (i.e. an individual topic, lesson, or quiz), you may do so from the user’s profile. Navigate to the desired course, click the “(details)” link, and un-select the desired lesson/topic/quiz.
Data of Deleted Users
When a user is deleted it also deletes all of their course and quiz data.
How to permanently delete a user or a group’s course data.